Turn Screenshots Into Beautiful Social Posts
Or


Turn Screenshots Into Social Content In Seconds
The Chrome extension that turns any screenshot into a social media post in one click. Auto-generated captions for Twitter, LinkedIn, Instagram, and Facebook.

Capture screen everywhere
Click the LumaStack icon to screenshot websites, dashboards, tweets, designs, metrics—anything visual. Full page, visible area, or custom selection.
Smart templates
Where alignment, spacing, and hierarchy are handled automatically. Forget nudging a logo 1px to the left.
AI Writes Your Caption Description
Our AI analyzes your screenshot and generates platform-optimized captions. Twitter-ready hooks, LinkedIn thought leadership, Instagram-friendly vibes. Pick one or edit to match your voice.
Post to All Platforms Description
Choose Twitter, LinkedIn, Instagram, or Facebook. Post to one or all simultaneously. Your screenshot is auto-sized and optimized for each platform. Hit publish and you're done.
Platform-Optimized Captions. Instant Multi-Channel Publishing.
One screenshot, perfectly formatted for Twitter, LinkedIn, and Facebook—posted simultaneously in seconds.
-
Twitter (X)
Punchy captions under 280 characters, optimized aspect ratio
-
LinkedIn
Professional context and insights, ideal dimensions
-
Facebook
Conversation-starting hooks, timeline-optimized size
-
Instagram
Engaging captions with strategic hashtags, square format

Built for People Who Screenshot Their Work
You don't need a design degree to look like a pro; you just need a tool built by one.
Share Your Wins in Seconds, Not Hours
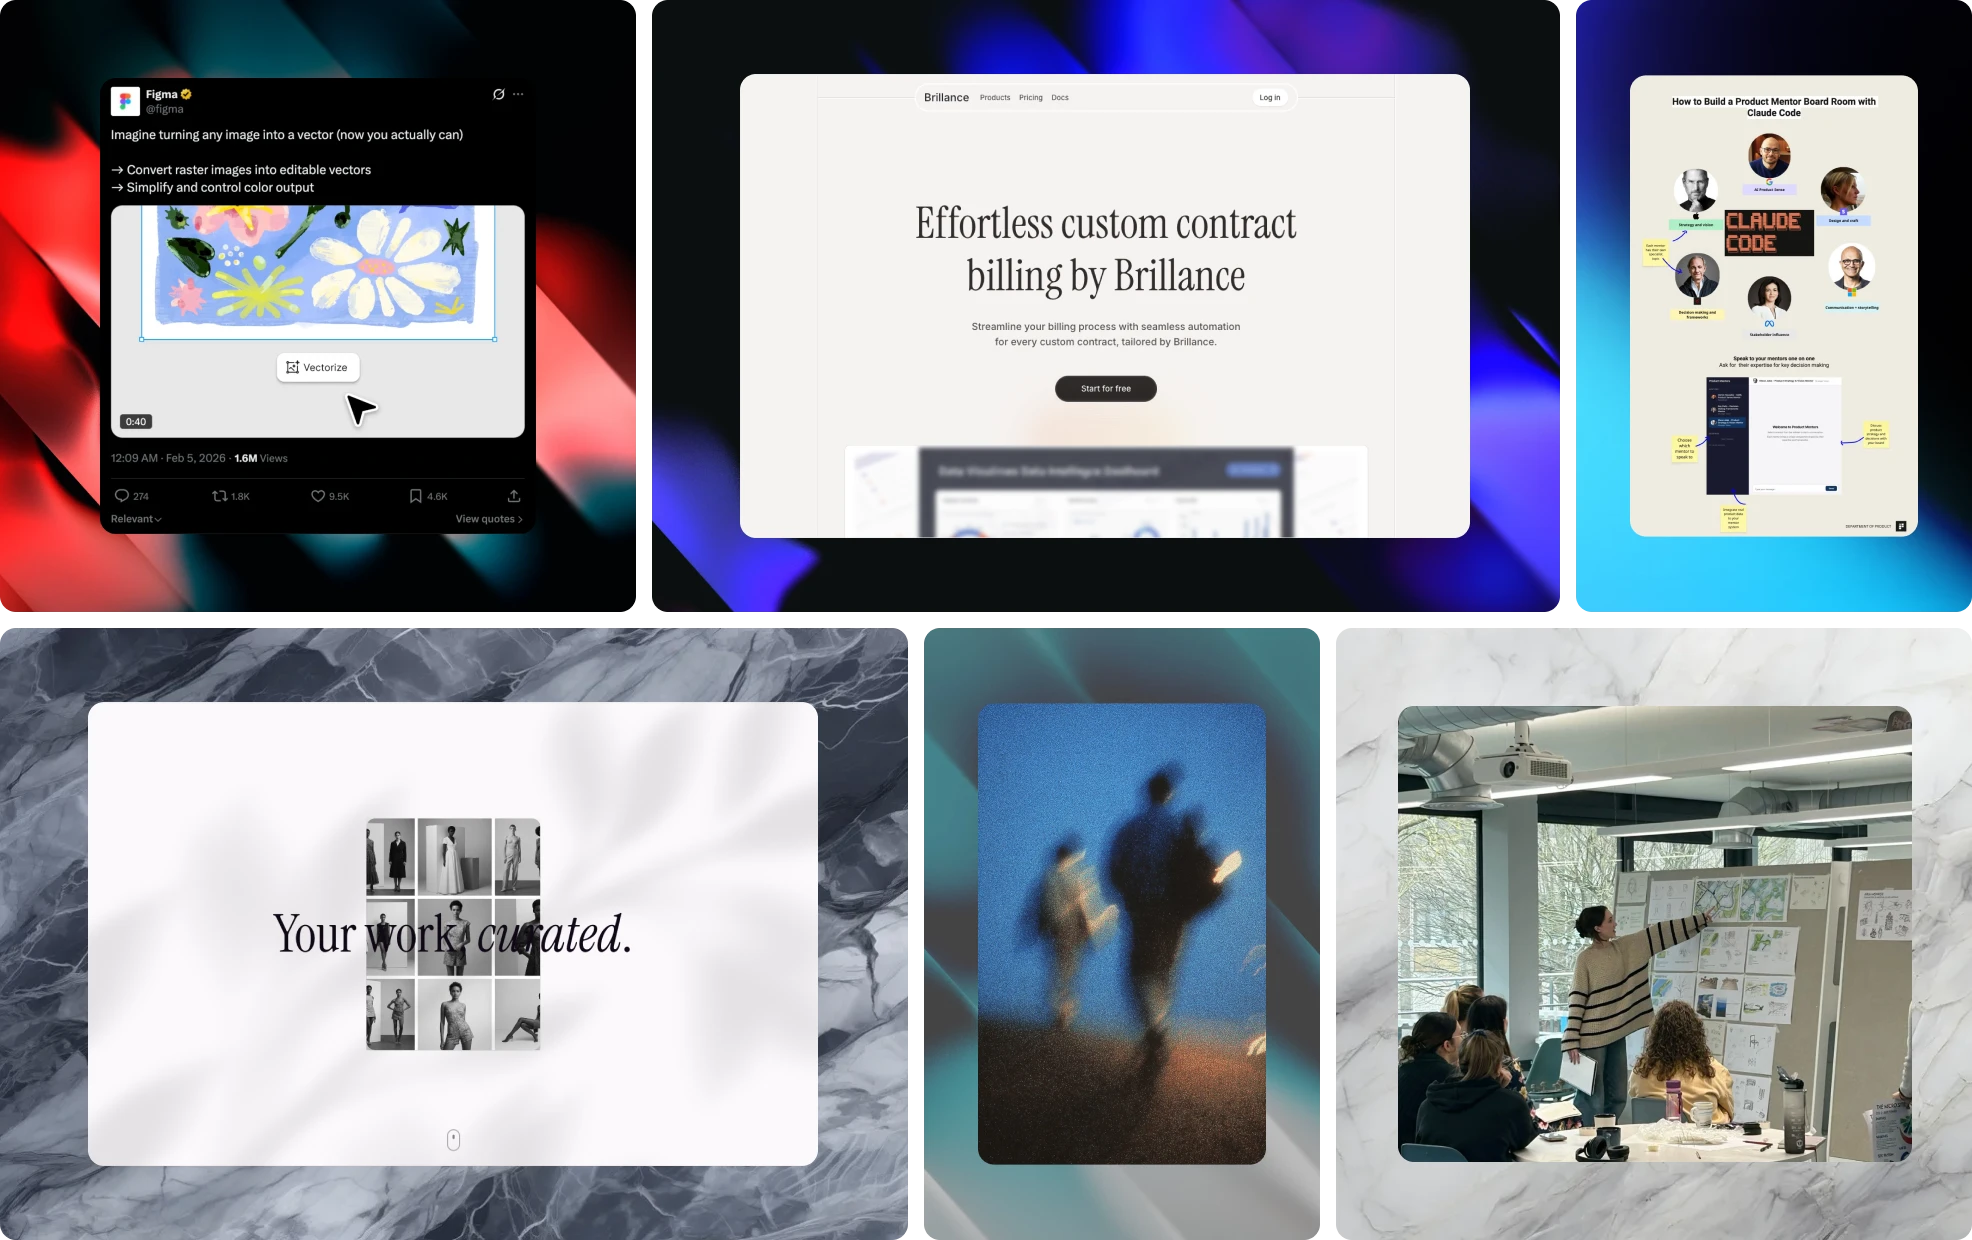
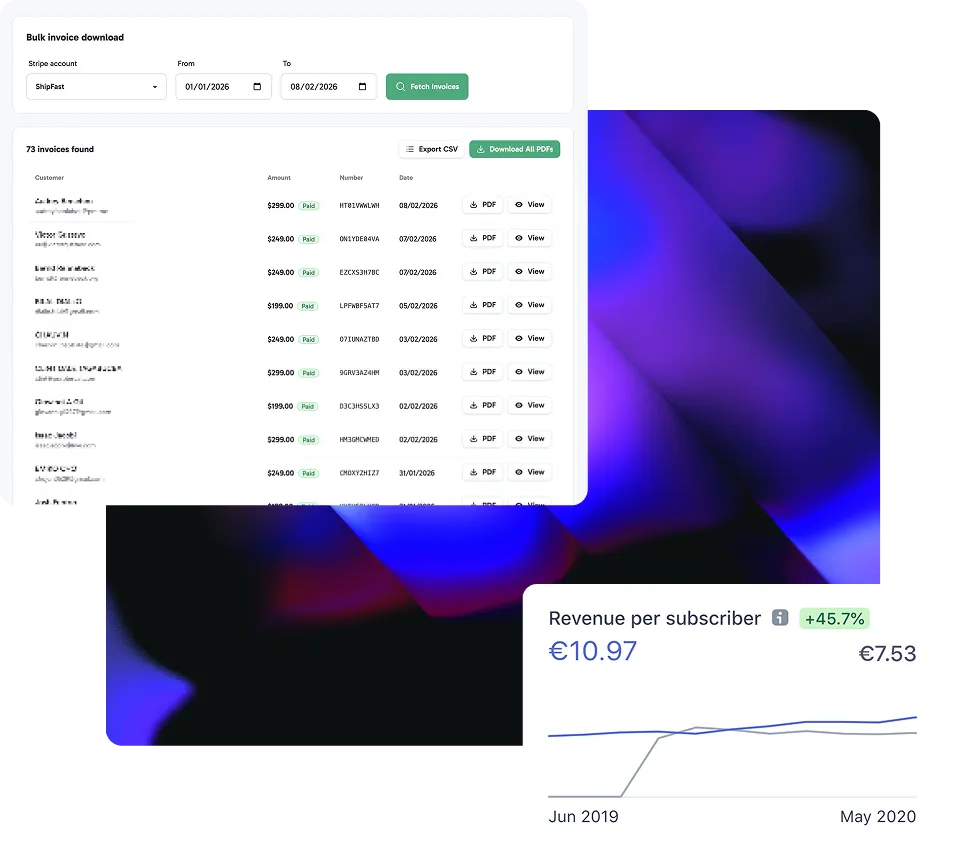
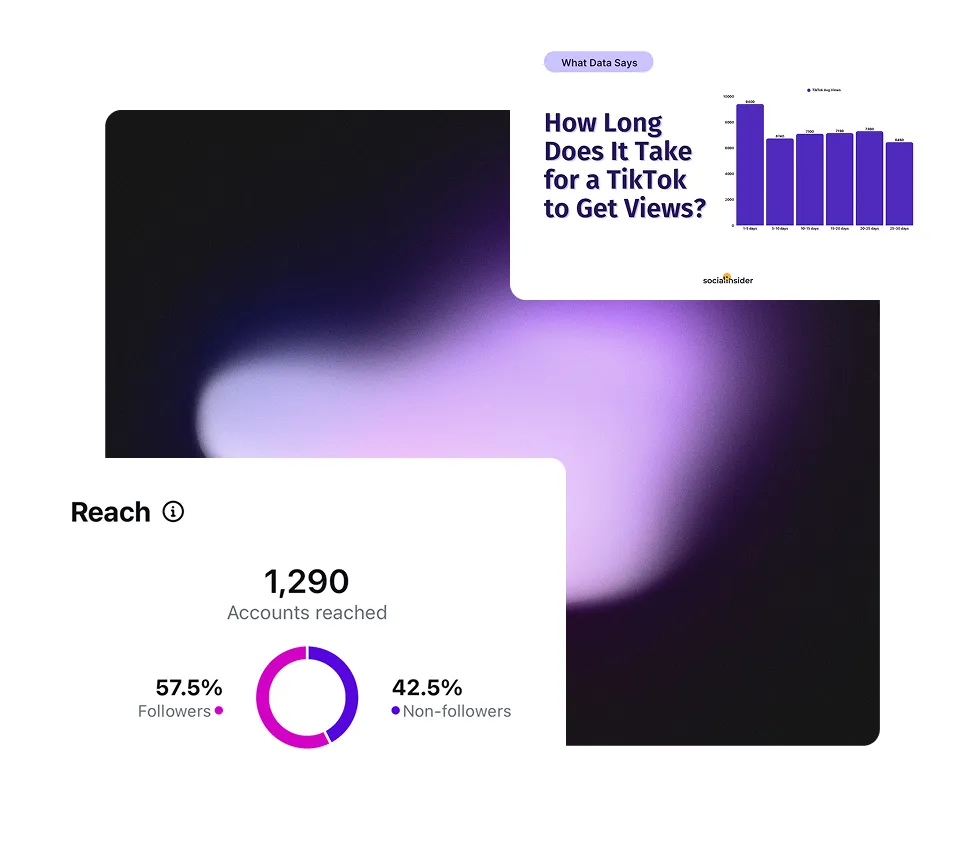
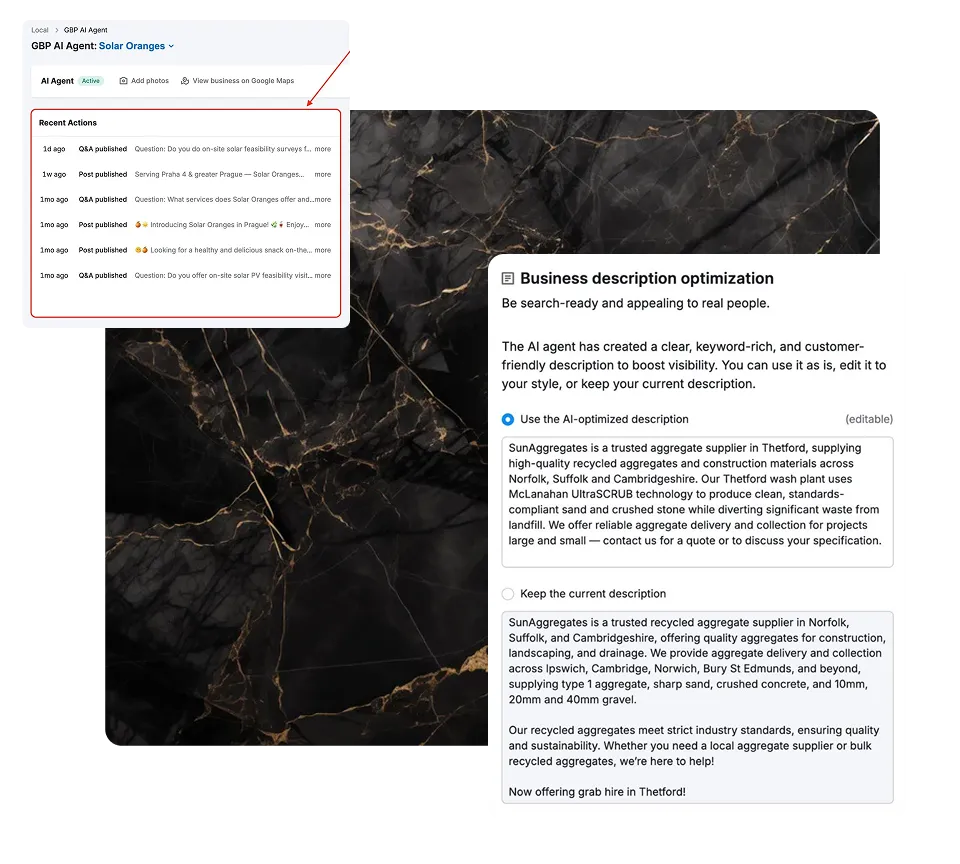
Post your revenue milestones, analytics dashboards, and user testimonials the moment they happen. No more "I'll share this later" because formatting takes too long. Screenshot your Stripe dashboard, get an authentic caption, and celebrate your growth while it's still exciting.
Common Screenshots
- Analytics dashboards
- Stripe revenue
- User testimonials
- Feature releases
Everything You Need in One App
Capture & Editing
-
Smart Screenshot Capture
Full page, visible area, or custom selection. Works on any website. One-click capture with keyboard shortcuts. Never miss the perfect moment.
-
Instant Editing
Need to annotate? Add arrows, highlights, blur sensitive info, or crop before posting. Built-in editor means no external tools needed.
- Coming soon
Screenshot Library
All your screenshots saved automatically. Search by date, platform, or caption. Repost winners or repurpose old content in seconds.
Content Creation
-
AI Caption Generator
Get 3 platform‑specific captions (Twitter, LinkedIn, Instagram) in seconds.
-
Branding & Consistency
Save brand colors, fonts, and watermarks. Screenshots look professional and on‑brand.
- Coming soon
Text recognition
Capture any non-selectable text so you don't have to retype it manually
Content Distribution
- Coming soon
Schedule Post
Capture now, post later at optimal times.
- Coming soon
Multi‑Platform Publishing
Post to Twitter, LinkedIn, Instagram, and Facebook simultaneously or selectively. One click distribution.
FAQs
Everything you need to know to start creating confidently.
LumaStack is a Chrome extension that automates your screenshot-to-social-media workflow. Capture any screenshot, get AI-generated captions optimized for each platform, and post to Twitter, LinkedIn, Instagram, or Facebook in one click.
LumaStack isn't for creating graphics from scratch—it's for sharing screenshots quickly. If you already have visual content (analytics, tweets, dashboards, designs) and need to post it fast, LumaStack automates the entire workflow.
No. Your screenshots are already visual content. LumaStack just makes them social-ready with AI captions and automatic formatting for each platform.
Yes, it’s free during the Beta phase, and we also offer a free plan. No credit card required. You can upgrade to Pro anytime for unlimited usage across all platforms.
Absolutely. Pick your favorite and edit it before posting, or use as-is.
Not yet—LumaStack is a Chrome extension for desktop. We can email you the install link to set up on your computer later.
Export as PNG, JPG, or SVG. All formats are optimized for social media platforms
Your Next Viral Post Is One Screenshot Away